Tuesday, 25 October 2011

How to Care for a White Orchid Plant


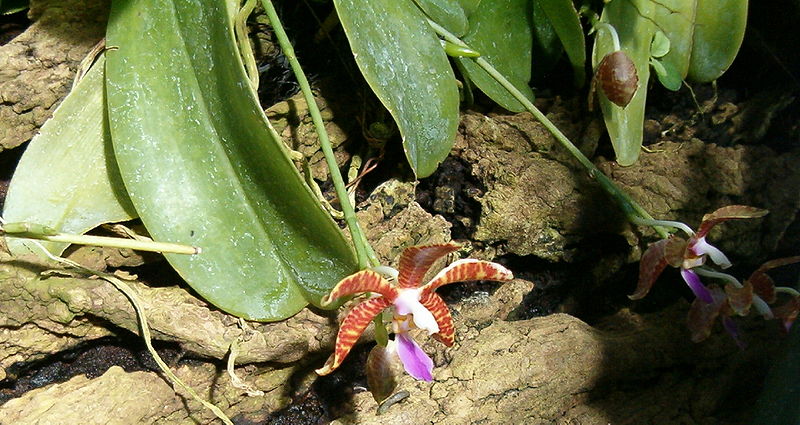
Dendrobium 'farmeri' orchid in full bloom. image by Amruth:commons.wikimedia.org

Overview

Orchid plants, known botanically as orchidaceae, come from a vast family of perennial flowering plants with over 20,000 species and over 100,000 natural and hybridized cultivars. Amongst these varietals, many thousands of the plants produce pure white blooms, or blooms that are white combined with one or more other hues. Some of the white orchid species most commonly available in retail settings include phalaenopsis, dendrobium, paphiopedalum, cattleya and cymbidium orchid plants.
Step 1

Provide a growing location that has bright to gentle indirect light according to the species preferences. Never place your white flowering orchid in direct sun, as it can burn the leaves and blooms and dry out the plant rapidly. When in bloom, the plants can be placed in low light conditions for a few weeks at a time, which may help to preserve the bloom spike over a longer time period.

Step 2

Water your orchid once every 5-7 days as needed to keep the potting medium just barely moist or slightly dry before watering again. Watering frequency will vary by climate and by species but this rule of thumb works for the most commonly available plants. If you are in a dry climate or using air conditioning or heating mist your orchid plant daily with water. For a lower maintenance way to raise the ambient humidity, place the orchid pot on top of a shallow tray or dish of stones and filled with water. Replenish the water as it evaporates.

Step 3

Fertilize your orchid once a month with a water soluble high nitrogen orchid formula. Pour the diluted fertilizer solution over the plant roots that have already been wet with water. Follow the fertilizer directions to determine dose and always err on the side of less fertilizer as over-fertilizing can damage the roots and shorten the life of the bloom.

Step 4

Pot and re-pot your white orchid in the potting medium that its species calls for. If you have an ephiphytic orchid that grows on a tree surface in its natural setting use an orchid bark mix with charcoal and perlite but no soil. It your white orchid is a terrestrial species and grows in the ground use an orchid potting mix with bark, charcoal, perlite with the addition of soil and/or peat moss. Epiphytic orchids prefer a mix that is lighter, airier and holds less moisture, while terrestrial orchids enjoy a bit more moisture and material blanketing the roots.

Step 5

Cut back the flower spike at its base after the bloom fades and the flower stem has browned and desiccated. Allowing the stem to die back before removal allows the nutrients in the stem to flow back into the plant. While it may look unsightly for several weeks it will help with the odds of reblooming.

Step 6

Re-pot your orchid plant every two to three years increasing the pot size incrementally by an inch or two inches but no larger to prevent swamping the roots. Slide the plant out of the old pot gently and brush off all of the old bark or potting soil that stick or has become entangled in the roots. Add a few inches of fresh potting mix to the new pot, set the orchid down into the pot and fill in around the roots well with orchid mix. Drench with water to settle the new medium and top off with more orchid mix if needed.

How to Prune Orchid Plans


Phalaenopsis lueddemanniana orchid in bloom image by BotBln:commons.wikimedia.org

Overview

Orchid pruning should be carried out in accordance with the orchid's natural processes in order to prevent shock and damage to the plant. Delicate and spare in both foliage and bloom, orchids require infrequent grooming. Pruning orchids calls for sterile sharp blades and a minimally invasive technique. What may appear to be dead and dying to your eyes may in fact be live tissue that is still feeding the orchid in some way as it fades, a process botanists call translocation. The rule is to prune orchids judiciously and infrequently.
Step 1

Remove damaged, diseased or dying orchid leaves only after they have withered, yellowed and gone limp. Allowing the fleshy leaves to die back slowly gives the plant time to transfer its stored nutrients and energy back into the plant roots. When the leaf is ready to be removed, you will be able to lift it off of the stem with only the very slightest pulling motion and it will come away from the stem cleanly.

Step 2

Cut down the flower stem or spike from your orchid when it looses it natural color and becomes brown, shriveled and crispy dry in texture. While this may mar the look of the orchid as a houseplant for a few weeks, it can mean all the difference in getting your orchid to bloom again next year. Flower spikes should be cut down at the base of the plant where the stem emerges between the leaves. Sharp sterile scissors are best for this.

Step 3

Prune or trim orchid plant roots conservatively and only when they lose their volume and become flat, desiccated, shriveled and brown. Use a fresh sharp razor blade or a sterilized pair of sharp scissors to cut through the root cleanly. Cut away in small sections and stop immediately if you see live tissue inside the root. Water well with tepid water after root pruning to reduce shock.

Monday, 24 October 2011

How to Plant an Orchid


Phalaenopsis hybrid orchid in bloom image by Jerzy Opiola:commons.wikimedia.org

Overview

Orchids, be they terrestrial or ephipyhtic, can readily be potted up to be grown as indoor or outdoor plants. When re-potting orchids, the most important elements are having a pot that has many drainage holes on the sides and bottom, and a good quality potting medium that provides the ideal growing substrate for your particular varietal of orchid.
Step 1

Select a pot specially made for orchid plants or a garden pot with good side and bottom drainage. Use a pot that is 1 to 2 inches larger in diameter than the orchid's current pot or rootball.

Step 2

Prepare the orchid for potting by watering the plant well to make the roots flexible. Gently slide the orchid out of its pot while holding it on its side. Gently brush off the old potting medium from the roots and lift off any bark that may be stuck or embedded in the roots. Cut away any dessicated, dried and hardened roots with sterile scissors or a razor blade.

Step 3

Place an inch or so of orchid mix into the bottom of the new pot and set the orchid down into the pot. Scoop the orchid mix down around the roots poking it down into place with your fingers or a chopstick. Shake the pot and rap it gently on a hard surface to settle the medium into the roots and add more medium until it reaches within 1/4 to 1/2 inch of the pot rim.

Step 4

Place the pot down in the sink and run tepid water through the plant pot to drench it and settle the medium. Avoid splashing water on the orchid flowers themselves if the plant is in bloom. After watering, add more medium to fill in any gaps that have settled.

Step 5

Thread a narrow bamboo stake through the roots without puncturing them, to provide a support if a flower stem is present on the orchid. Secure with twist ties or tiny plastic clips to connect the stem to the support.

The Introduction Of Orchids

Orchids belong to the Orchidaceae family is the family that have large variations in the form of flowers and trees to determine the genus and species. There are more than 111 genera and 808 species of orchids in Malaysia.

In general, orchids can be distinguished by the shape of flowers, roots, leaves and stems. However, flowers are the most suitable tree or visits to identify the genus of orchid plants. In general, commercial orchids can be classified into two major groups, namely orchid and monopodium simpodium.

Simpodium is the way of growth ended with the production of flowers. Orchids in this group can grow either on trees (epiphytes) or on land (terrestrial). Trees shaped like a bulb trick, go, and has a strong double or multilateral negotiations. It has all of the long bulb-segment or short segmental no segmental. The roots and leaves are derived from pseudo bulbs and new shoots will produce flowers when mature. Genus-commercial orchid genus found in the simpodium is Oncidium, Cattleya and Dendrobium.

Monopodium is the way of growth does not end with the production of flowers. The stem is covered by small-upih upih leaves. Air coming out of the roots to penetrate upih stem leaves. Monopodium orchid stem is branched and may issue a new browse after the cut. Stem cuttings and planted in pots on the ground is not moist. Genus-commercial genus found in the monopodium is Venda, Arachnis, Renanthera, Aranda and Mokara.


Orkid Dendrobium


Orkid cattleya